GitHub + jsDelivr + TinyPNG + PicGo - Building a Stable, Fast, and Free Image Hosting Solution
# GitHub + jsDelivr + TinyPNG + PicGo: Building a Stable, Fast, and Free Image Hosting Solution
# Introduction
Q: Why use an image hosting service? What is it?
A: When writing blog articles, uploading and storing images is a challenge. Some people put images in the same repository as the blog and use relative paths to reference them, which becomes difficult to maintain later. Others publish the same article across different platforms, requiring image uploads to each platform. To solve these problems, the recommended approach is to upload images to a third-party online static resource library — what we call an image hosting service — which returns an image URL. Using markdown + image URL for writing means you write once and use everywhere.
A Better Option...
The content below is somewhat outdated. I've since discovered a better, more convenient image hosting tool: https://picx.xpoet.cn/ (opens new window) Just check the usage tutorial on their website. Goodbye~~
2021.07.04
Q: Which image hosting service to choose?
A: I recommend using GitHub as an image host. It's free and stable, with one minor drawback — slow access speed in China. But don't worry, you can use jsDelivr for free CDN acceleration.
Q: What is jsDelivr?
A: jsDelivr is an excellent public CDN service provider. It's the first CDN service to bridge mainland China and overseas, so you don't need to worry about China's firewall affecting usage. Official website: http://www.jsdelivr.com/ (opens new window)
# Building the Image Hosting Service
Create a new GitHub repository. Make sure to set it as public.
Follow the official documentation (opens new window) to generate a token.
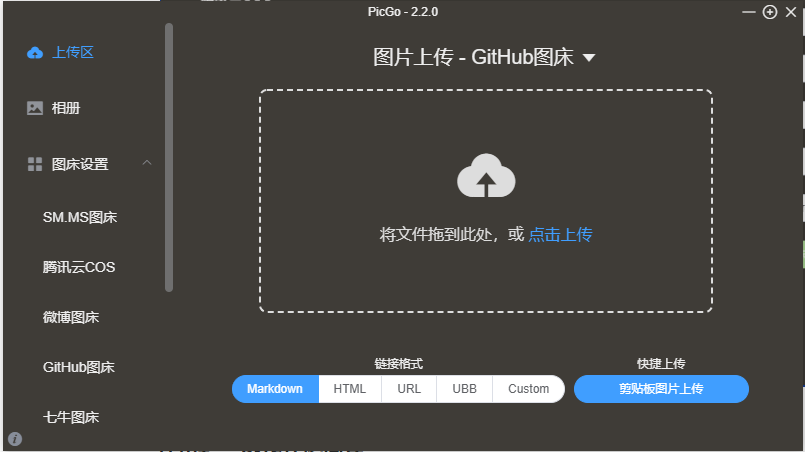
Download PicGo from here (opens new window). After installation, open it, go to
Image Hosting Settings, selectGitHub, and fill in the required information:- Repository name: The repository you just created, format:
<username>/<repo-name> - Branch name: Fill in the main branch
master - Token: The token generated earlier
- Storage path: Fill in according to your needs
- Custom domain: After uploading, PicGo generates access links using
custom domain + uploaded image name. Here we fill in jsDelivr's CDN acceleration URL, format:https://jsd.cdn.zzko.cn/gh/<username>/<repo-name>
- Repository name: The repository you just created, format:

- Use https://tinypng.cn/ (opens new window) to compress images before uploading (skip this step if images are already small or you have a better compression tool).
- Upload images in PicGo's
Upload Area, then go toGalleryto copy the URL of the just-uploaded image with one click. Now you can happily insert images in your articles! Explore more features on your own.